The Double Exposure Effect
Double exposure has been a popular effect in photography for a long time. So why not take it to video? For this effect, you’ll need:
- A high res portrait photo
- Stock video of scenery or an object that isn’t too busy
- Some skill with photoshop
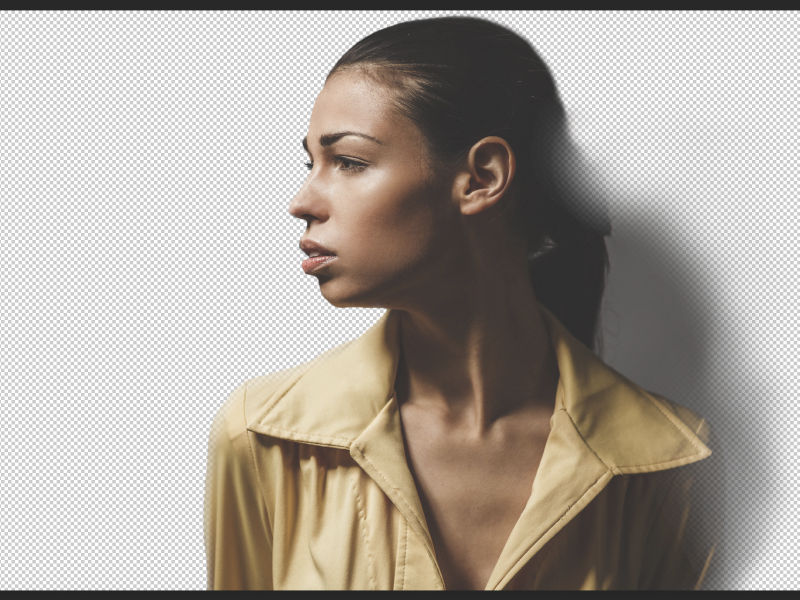
Isolate your subject. Take your portrait photo and bring it into photoshop. You’ll want to separate your subject from your background. If you’ve read the other tutorials in this series, then you know my favorite method for isolating objects. But just in case, here are the steps:
1. Use the quick selection tool to select your object or subject. It doesn’t have to be perfect, but the more accurate you can make it, the less time you’ll spend in the third step.
2. Create a mask out of the selection by clicking the “Add Layer Mask” button in the bottom right.
3. Select the black and white mask layer. Use the brush tool to fine tune your mask. I often soften up and smooth out the edges in this step, as the quick select tool usually creates fairly rough and unattractive edges.
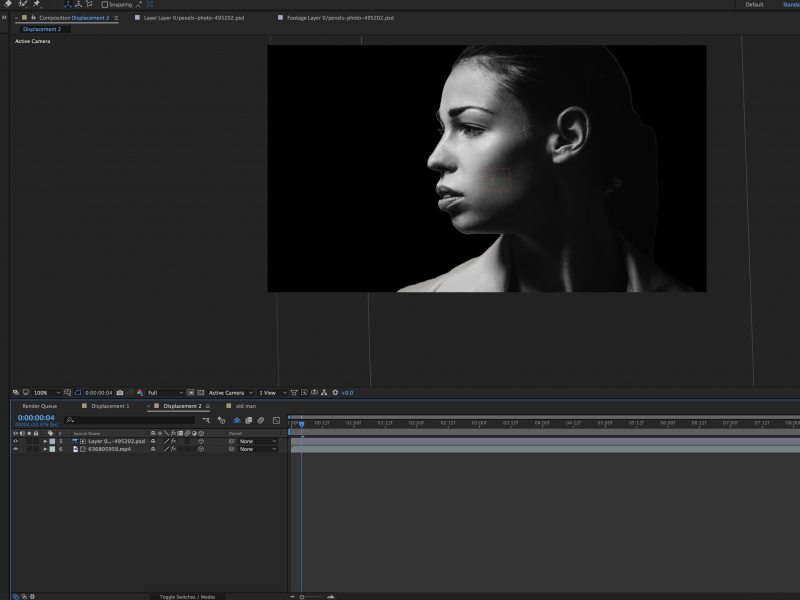
Create an alpha track matte in After Effects. Open After Effects and bring in your Photoshop file and video file. Create a new composition and pull those two assets into the timeline. Layer them so that the photoshop file is on top of the video layer.
Now, before you create the alpha track matte, you need to make two adjustments to the photoshop layer.
Add the Tint effect and set the “Amount to Tint” to 100%. This will turn your photo black and white. Next, add the Curves effect. Manipulate the curve to create a high contrast photo. Duplicate this layer.
To create the alpha matte, make sure you can see the “TrkMat” menu to the right of your layers.

Choose “Alpha” under “TrkMat” on your video layer. This will take the alpha information of the layer above (in this case your photoshop file) and create a mask on the video file, so that it only shows within the bounds of your subject.
*Note: to see this effect, you will need to toggle the visibility of the top layer off.
Take the top photoshop layer, the one that you duplicated earlier, and change the opacity mode to “Luminosity”. I set my opacity to 75% – but you can choose whatever you think looks best.
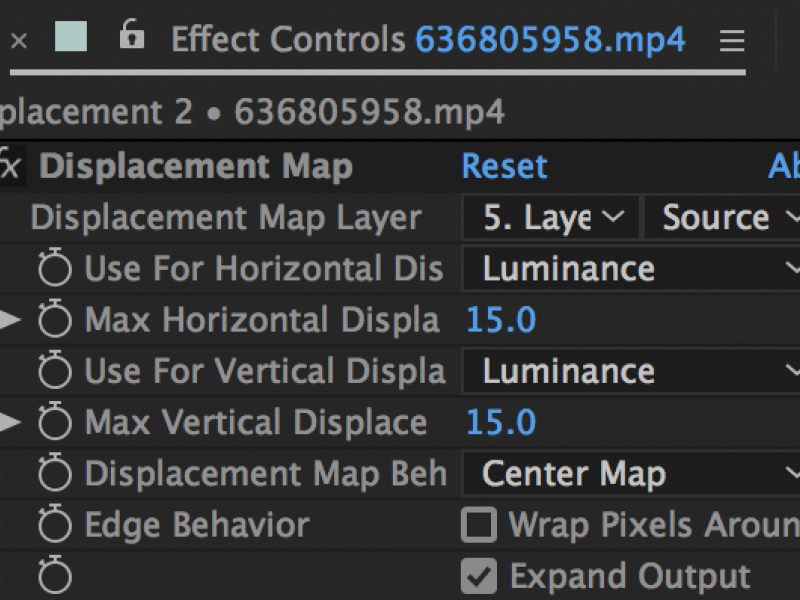
To make the video footage move across the skin, as if it was projected, apply the “Displacement Map” effect to the video layer. Under “Displacement Map Layer” choose one of your photoshop layers. Next, you’ll want to play with the controls to see what give you the best effect. I tend to go for a more subtle displacement, as too much will warp the video oddly. Below shows my settings.
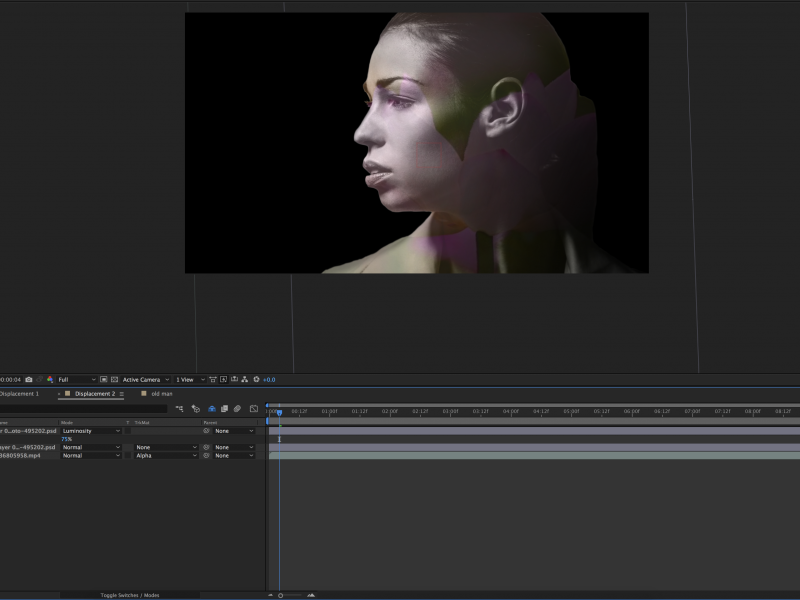
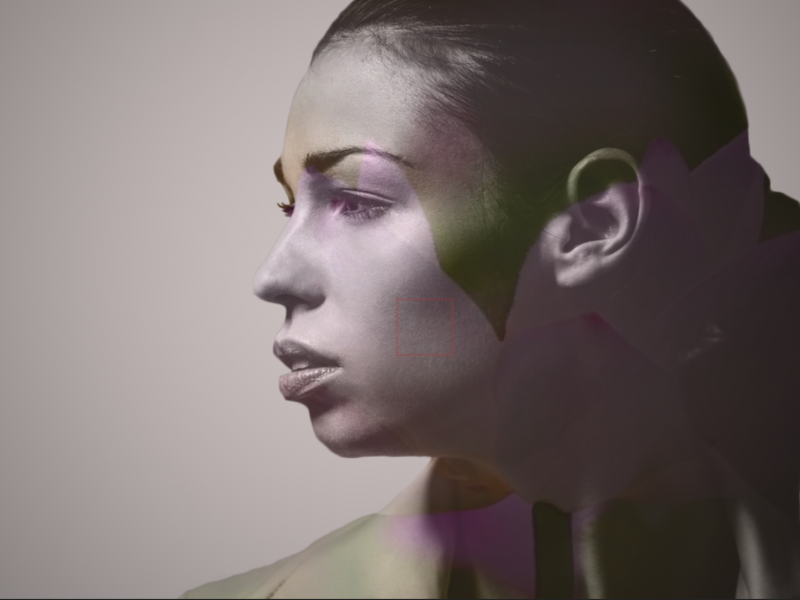
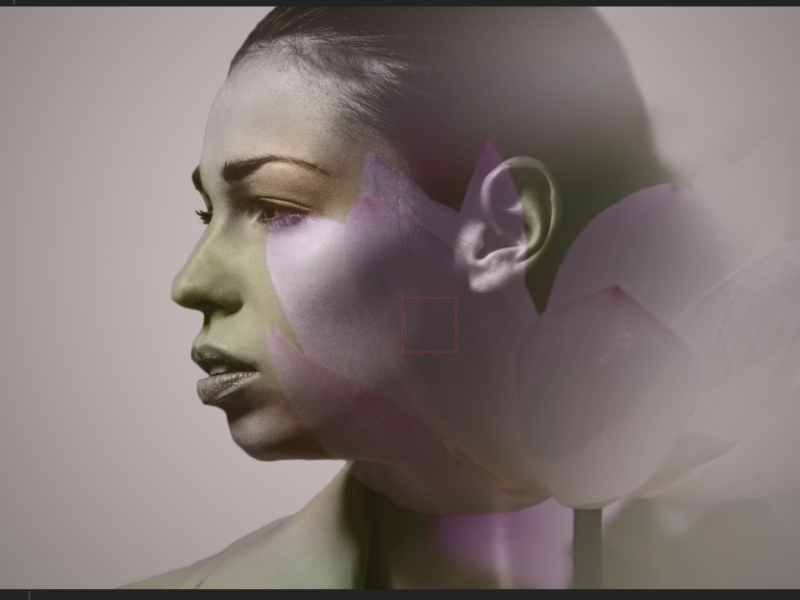
At this point, you’ll have something that looks like this:
Now to add the touches that make this effect really pop. First, add a background. You can do this by going up to Layer > New > Solid. I used the dropper tool to sample a color from the composite, which makes the portrait really blend well with the background.
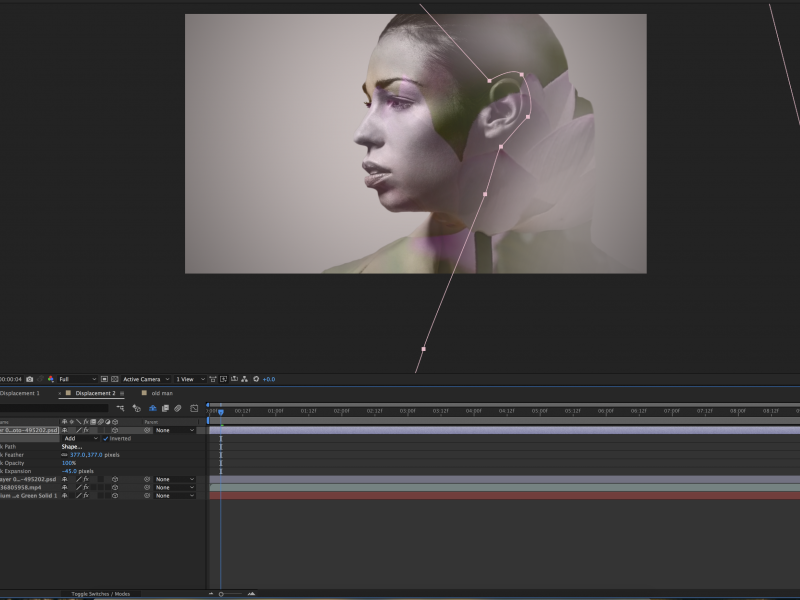
This is looking okay at this point, but not as engaging as I’d like. To make the composite more interesting, select the pen tool from the upper toolbar and mask off an area of the visible photoshop file and check “Inverted”. This will make part of the upper photo layer invisible, reducing some of the detail. You can play with the “Mask Feather” and “Mask Expansion” under the mask controls to create a softer transition.
I also added a mask to the video channel to soften up the double exposure and create a feeling of bleeding or blending into the background.
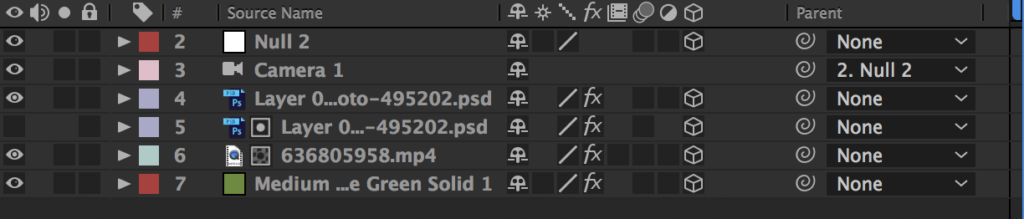
Last step, add movement! Finally, to make this portrait really come alive, go to Layer > New > Camera. Once the camera layer is created create Null Object by going to Layer > New > Null Object. Parent the Camera to the Null Object (if you don’t see a “Parent” panel to the right of your camera, select “Toggle Switches/Modes” at the bottom of your screen). Next, make sure 3D is enabled for every layer by checking the box underneath the 3D icon.
Now, go back to your Null Object and press “P” to open the position controls. Find your preferred starting position and create a keyframe by clicking on the stopwatch icon. Go to the end of your timeline and create your preferred ending position (a keyframe will be automatically created when you change the position values).
And you’re done!
This technique is very versatile – there isn’t “one way” to do it. So play around with your opacity controls, masks, and your original photoshop file to create new and different looks. For example, maybe you don’t want the portrait image to be so defined, and you’d rather have the flower extend more past the portrait. To do this, open your photoshop file and play around with your mask layer to bring back some of the background.
Now, if you go back to your After Effects file, you’ll see something like this:
I find these techniques fun, challenging, and a creative way to use photos instead of video. Hope you enjoy playing with these tools and getting creative!