
This technique features the puppet tool in After Effects. You won’t be able to do crazy or exaggerated movement with the puppet tool, as it distorts the image quickly. But it works great if you want to add just a hint of the slowest-of-the-slow movement.
For this technique you’ll need:
1. A high-res photo with a subject in action and fairly plain background – an out of focus background is the easiest!
2. Some ability with separating photos in photoshop
3. Patience (listening to some good tunes helps)
Separating your photo into different layers. If you’ve read “Parallax Tutorial” (link), then you’ve already read this – feel free to skip!
This step is the longest, tedious, and most important. First you’ll want to determine how many layers there will be in your parallax – usually there’s only two or three layers.
Duplicate the photo layer in photoshop. I start with the foreground first and move backwards – ending with the background image.
Begin separating out the objects that belong to the layer you are working on. There are many ways to separate objects out from an image, and you may have your preferred technique – but below is what I find most effective. (Note: make sure you hide the other layers you aren’t working on so you can actually see what you’re doing!)
1. Use the quick selection tool to select your object or subject. It doesn’t have to be perfect, but the more accurate you can make it, the less time you’ll spend in the third step.

2. Create a mask out of the selection by clicking the “Add Layer Mask” button in the bottom right.
3. Select the black and white mask layer. Use the brush tool to fine tune your mask. I often soften up and smooth out the edges in this step, as the quick select tool usually creates fairly rough and unattractive edges. You can also add hair detail back in this step that might’ve been missed in the quick select.
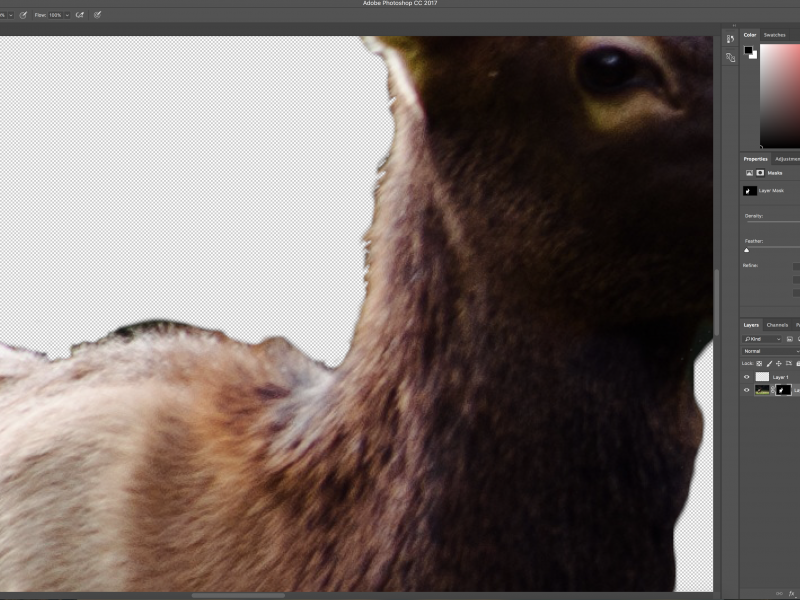
This method gives you a lot of control over the outcome and is a straightforward way to separate all the elements from your photo.e
Using the puppet tool. Once you’ve separated all your layers in Photoshop, bring that photoshop file into After Effects (making sure that you select “Editable Layers” on import). Create a new composition, drag your layers in, and scale and position them to your fancy.
Select the “Puppet Tool.”
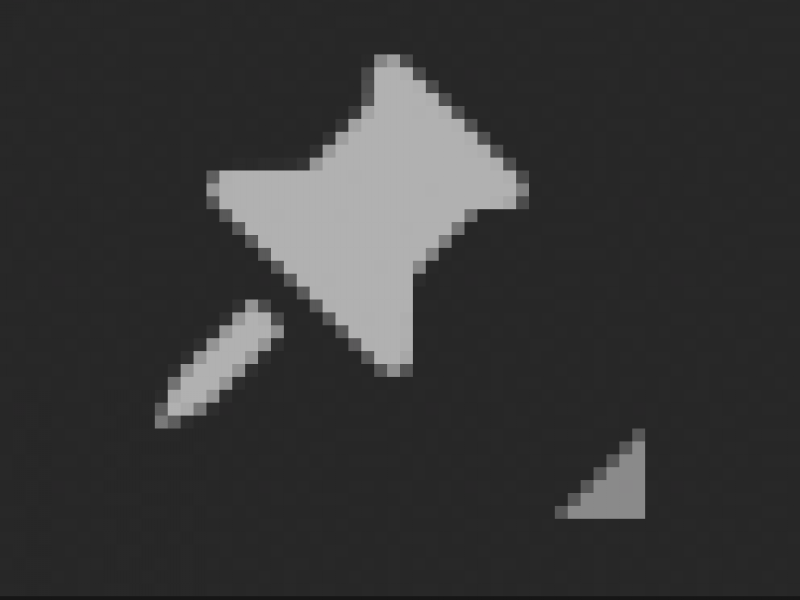
Pin your subject layer at the points where you want them to move, as well as the points that you want to stay still. I usually just pin at the joints.

Make sure you are at the beginning of your composition when you create these pins as they automatically create keyframes. Move your selector further down the timeline and slightly move the pins to a new position. And voila! Fake slow-mo.
You can sweeten this effect by adding particles, coloring the photo, or using it in conjunction with the parallax effect.